Showing posts with label Food. Show all posts

Monday, February 4, 2013

Rocky Road Brownies

Alright, maybe my quest for the perfect brownie isn't over quite yet.

These were good, but messy. USE NONSTICK FOIL.  And lots and lots of nonstick cooking spray, otherwise you'll lose half of the brownie to the pan.


  • 2/3 c unsweetened cocoa powder
  • 1/2 c all-purpose flour
  • 1/2 t baking powder
  • 1/8 t salt
  • 1/3 c canola oil
  • 1/3 c granulated sugar
  • 1/3 c packed light-brown sugar
  • 4 egg whites, lightly beaten
  • 2 t vanilla extract
  • 1/2 c finely chopped walnuts
  • 1/4 c mini chocolate chips
  • 1/2 c mini marshmallows
  1. Heat oven to 350.  Line an 8 x 8-inch baking pan with nonstick foil, overhanging ends of pan.
  2. In medium-size bowl, combine cocoa powder, flour, baking powder and salt.  Set aside.
  3. In a large bowl, whisk together oil, sugars, egg whites and vanilla.  Stir in cocoa mixture.  SPoon batter evenly into prepared pan.  Sprinkle walnuts over batter.  Bake at 350 for 25 minutes.  Scatter teh chips and marshmallows over the top and bake for an additional 5 minutes.  REmove from oven and cool completely.
  4. Tpo slice, coat a sharp chef's knife with cooking spray and cut into 25 squares, using a rocking motion.  Re-spray knife frequently.

    Monday, January 28, 2013

    My First semi-Homemade Pie. Ever.

    I was having one of those "being a mom is so hard" kind of days when my husband told me that he was taking the kids and for goodness sake would I go do something for myself.

    So I decided to make a pie.

    I've had the Crisco recipe for pie crust on my fridge for weeks now but I keep finding an excuse not to use it because, after all, the idea of making a pie absolutely terrifies me.  I had, however, purchased some canned cherry pie filling so at least I didn't have to think past the pie crust.

    I made 3 big mistakes:

    1. I did not chill the shortening nearly long enough. 
    2. My water was not icy cold.  And I added too much of it.
    3. Apparently it takes 2 cans of filling to make a pie.
    Here is my first semi-Homemade cherry pie:


    It didn't taste terrible.  Which is good.  But as I was lamenting my first trial with my husband he said, "Yeah, pies are really hard to make."  In spite of my 3 mistakes, my biggest frustration was actually tenting the outside rim with foil.  I baked the pie for 10 minutes and went to foil the edges and burned my thumb instead.  I guess you can foil the edges first and then take the foil off for the last 10 minutes as well; I didn't know about this option.  Also, I found out that they make silicone rims to make the whole process much easier.  Anyway, the edges of this pie ended up crispy.

    Move over quest for the perfect brownie recipe because I think I just found a new lifelong ambition.

    Next time I'm going to put my shortening in the freezer and a cup of water in the fridge.  Just to be safe.

    Sunday, January 20, 2013

    Fresh Broccoli Salad

    My coworker had a bridal luncheon a few months ago.  One of the ladies brought in a really delicious broccoli salad which another coworker requested that I find the recipe for.  I googled "Broccoli Salad" and found this one from allrecipes.com.  After I printed off a copy for this other coworker, I decided that it did, in fact, sound good enough to make myself so I gave it a try.  YUMMY!  Maybe one of the best broccoli salads I've had?


    Fresh Broccoli Salad

    • 2 heads fresh broccoli
    • 1 red onion
    • 1/2 lb. bacon
    • 3/4 c raisins
    • 3/4 c nuts
    • 1 c mayonnaise
    • 1/2 c white sugar
    • 2 T white wine vinegar
    1. Place bacon in a deep skillet and cook over medium high heat until evenly brown.  Cool and crumble.
    2. Cut the broccoli into bite-size pieces and cut the onion into thin bite-size slices.  Combine with the bacon, raisins, nuts and mix well.
    3. To prepare the dressing, mix the mayonnaise, sugar and vinegar together until smooth.  Stir into the salad, let chill and serve.

    Monday, January 14, 2013

    Black and White Chocolate Cupcakes

    I found this recipe in a BYU alumni article about the founders (who are BYU alumni) of one of my favorite bakeries: The Sweet Tooth Fairy.  (Another reason BYU is the superior school.  Ahem.)  I made these cupcakes a few weeks before Christmas. 


    I only had half of one before they had all vanished.  Not exaggerating.  That half that I DID have was very, very delicious.  Another plus?  They are super easy to bake.


    My daughter was in charge of the chocolate chip placement.  She also helped me swirl the frosting.  I think she did an excellent job.  (So does she.)


    Black and White Chocolate Cupcakes

    • 1 1/2 c all-purpose flour
    • 1 c granulated sugar
    • 1 c and 2 T dark chocolate cocoa
    • 1 1/2 t baking soda
    • 1 t salt
    • 1/2 c sour cream
    • 3 eggs
    • 3/4 c ready-to-eat chocolate pudding
    • 1/2 c butter, melted
    • 1 c semisweet chocolate chips
    1. Preheat oven to 350 F.  Line 24 cupcake pan cups with paper liners.
    2. In a large bowl, mix the dry ingredients together with an electric mixer on low speed for 30 seconds until well combined.
    3. Add wet ingredients and mix on medium speed for 1 minute.  Stop and scrape the sides of the bowl and resume mixing on medium speed for an additional minute.  Stop the mixer and fold in chocolate chips.
    4. Fill the prepared cupcake liners with batter 3/4 full.  Bake about 15-18 minutes in the preheated oven, until a toothpick inserted in the center of a cupcake comes out clean.  Let the cupcakes cool completely before frosting.
    White Chocolate Frosting

    • 8 oz. cream cheese, softened
    • 1/4 c butter, softened
    • 1 c white chocolate chips or 6 oz. white chocolate, melted
    • 1 t vanilla
    • 2 1/3 c powdered sugar
    1. To make the frosting, beat cream cheese and butter in a large bowl with an electric mixer on medium speed for 1 minute.  Add melted chocolate and vanilla; mix for an additional minute.  Add powdered sugar gradually, beating until light and fluffy after each addition.
    2. Spread the frosting on the chocolate cupcakes.  Garnish with fresh raspberries, chocolate chips, or chocolate sprinkles.

    Monday, November 26, 2012

    Hot Chocolate on a Stick

    Merry Christmas!

    I have 2 secrets:

    (1) I made these 2 years ago and never posted about them
    (2) I'm actually writing this up at the end of May and it is currently 80 degrees outside.  You should be jealous.  Don't worry, I am too.

    I wrote down all of the instructions on this blog after I finished making these Hot Chocolate Sticks, assuming I would get to adding pictures soon after.  It never happened.  Then today (May 20th, 2012) I noticed that there was still a draft hanging out on blogger.  So I figured, what the heck.  I love the schedule option on Blogger.

    I needed something fast, cheap and easy to make for 2 dozen coworkers (this was back when I still made handmade gifts for them) and I found this great idea online to make Hot Chocolate on a Stick.  Basically, you make a chocolate lollipop and melt it in hot cream or milk, making a yummy cup of hot chocolate.  I thought I'd give it a shot.

    Here's what you need:


    • a ziploc bag
    • lollipop sticks
    • an ice cube tray
    • 8 oz high quality chocolate (as you can tell, I used Ghiradelli.  Yum.)
    • 1/4 c cocoa powder
    • 1/2 c confectioner's sugar
    • a pinch of salt
    • white chocolate baking morsels
    • crushed peppermint candy

    Melt the chocolate:


    Sift the sugar and cocoa into a small bowl and set aside.


    Break the chocolate into small pieces.


    Heat some water to about 90 degrees (I don't know why this exact temperature is important, but I do know that chocolate can be fickle.) Place a bowl with the chocolate over the water.  (This method works so well that I will never buy a double boiler.)


    Stir until 2/3 melted.


    I must show you a step-by-step of this happening.  Makes me drool a little.  Especially considering that as I am writing this I am 33 weeks pregnant.


    Take bowl off of water and continue stirring until completely melted. Make sure no water gets into the chocolate mixture at all. 


    Slowly stir the cocoa/sugar mix and the pinch of salt into the melted chocolate until you get a smooth consistency.  If I remember this was a lot more difficult to do than it sounded.  I had to stir for quite a long time before the consistency was right.  I also used a whisk instead of a sifter which may not have made the cocoa/sugar mix as fine as it needed to be.  Since then I have acquired a sifter.  I would recommend you do the same if you don't have one.  :)


    Fill the molds with Hot Chocolate Mix.


    Spoon this into a ziploc bag.  


    Cut the corner off.  This is such a great way to not only fill chocolate molds, but cupcake liners as well.  EASY TO CLEAN UP!


    Fill the ice cube try with the chocolate; this recipe makes about 10 cubes. Shake the tray back and forth or tap it on the counter to make the tops even out.


    Let the mix form:


    Leave the ice cube tray for a minute or two. Now put one stick into each cube. Hold them for a second or two; they should stay in fairly easily. Leave the tray on the counter and let them harden for a few hours. After set, they should come out easily.


    Decorate the hot chocolate sticks:


    This part is optional.  I decided to dip these in melted white chocolate and crushed candy cane.  I also added a candy cane and a few Christmas themed marshmallows in the bag.


    Make Hot Chocolate from the stick:


    Pour 3/4 c of milk or milk with cream into a mug and heat in the microwave for 1 to 1-1/2 minute. You want it warm enough to melt the chocolate.  Don't forget to include instructions for the recipient as well!


    I test-tasted one of these before handing them out.  It was a very rich cup of cocoa.  I think the only thing I would have changed is I would have used a sweeter chocolate to begin with.  But I prefer sweeter chocolate over bitter chocolate.

    Monday, November 19, 2012

    Checkerboard Sweet Potatoes

    I made this dish for our family's pot-luck-style Thanksgiving last year.  It probably looked better than it tasted, but if you like your sweet potatoes a 'la casserole, then this one's for you.

    Recipe from familycircle.com

    Ingredients
    • 3 pounds sweet potatoes, peeled and cut into 2-inch chunks
    • 1/2 cup whole milk
    • 4 tablespoons butter
    • 1 8 ounce can crushed pineapple, drained
    • 1/4 cup brown sugar, packed
    • 1 teaspoon pumpkin pie spice
    • 1/4 teaspoon salt
    • 20 marshmallows
    • 40 pecan halves

    Directions

    1. Cover sweet potatoes with cold water and bring to a boil. Reduce to a simmer and cook 12 to 15 minutes or until knife-tender. Drain and return to pot. Mash potatoes with a potato masher, then stir in milk, butter, pineapple, brown sugar, pumpkin pie spice and salt.

    2. Transfer mixture to a 2 1/2-quart oval casserole dish; smooth out top. Starting at the top left, alternate one marshmallow with two pecan halves until the entire casserole is covered. Bake at 350 degrees F for 25 to 30 minutes, or until marshmallows are browned and puffed.

    Monday, November 12, 2012

    Homemade Cranberry Sauce

    One of my very favorite parts of Thanksgiving Dinner is the Cranberry Sauce.  A few years ago we decided to be super-domestic and make our own from scratch.  Little did we know it was really very easy and there is something about saying you've made anything yourself.  So it continues to be a yearly tradition now.


    Homemade Whole Berry Cranberry Sauce
    (Makes 2 1/4 cups)

    Recipe from Oceanspray.com

    1 c sugar
    1 c water
    1 12-oz. package Fresh Cranberries, rinsed and drained

    Combine water and sugar in a medium saucepan. Bring to boil; add cranberries, return to boil. Reduce heat and boil gently for 10 minutes, stirring occasionally. Cover and cool completely at room temperature. Refrigerate until serving time.

    That's it!  It is the easiest Thanksgiving recipe by far.  Try it!  You'll love it!

    Monday, October 8, 2012

    Ultimate Chocolate Chip Cookies

    I discovered something about myself this summer while on maternity leave: not only do I love to bake, I need to bake.  There are so many links between cooking and science as it is, it's ridiculous.  But Baking and Chemistry are, in my mind, the same thing.  One small error and you could blow a room up (or in this case, end up with two hours wasted on a disastrous batch of baked-goodness.)  It's that kind of suspense that has me keep trying again and again until I have success.

    I also discovered that my sweet daughter likes to bake, too.  Her favorite part is licking the spatula, of course, but she knows she has to be an extra good helper to get to that point.

    I found this recipe on the cardboard overlay for those Crisco baking sticks (SO worth the extra cost to have that stuff premeasured for you!)

    These are arguably the best chocolate chip cookies I've ever made/had.


    Ultimate Chocolate Chip Cookies

    Makes 3 dozen

    3/4 c. shortening
    1 1/4 c firmly packed light brown sugar
    2 T milk
    1 T vanilla extract
    1 large egg
    1 3/4 c All Purpose Flour
    1 t salt
    3/4 t baking soda
    1 c semi-sweet chocolate chips
    1 c coarsely chopped pecans (optional) (If nuts are omitted, add an additional 1/2 c chocolate chips)

    Heat oven to 375.  Beat shortening and brown sugar in large bowl at medium speed until light and fluffy.  Beat in milk, vanilla and egg.  Stir in flour, salt and baking soda.  Blend in chocolate chips and nuts.  Drop by rounded measuring tablespoonfuls 2 inches apart onto ungreased cookie sheets.  Bake 8-10 minutes for chewy cookies or 11-13 for crisp cookies.  Cool 2 minutes on cookie sheet.  Transfer cookies to cooling rack. 

    Monday, June 18, 2012

    Baked Fudge

    If you follow my personal blog then you know that I made it a goal in January to make a decent batch of brownies this year.  This recipe actually wasn't part of that quest, but these turned out somewhere between brownies and fudge so I guess they could be considered a candidate.

    They taste more like brownies but have the consistency of fudge.  They are...oddly delicious.  But they are also chocolate and that's all that matters.  Recipe follows.


    Baked Fudge

    Makes 30 square
    Made in 40 minutes

    Melt 1/2 c butter and 3 oz. chopped unsweetened chocolate together; gradually beat in 2 c sugar.

    Add 3 eggs, one at a time, beating well after each.  Add 1 t vanilla extract.

    Sift 1 1/2 c flour with 1/8 t salt; add to chocolate mixture along with 1 c chopped walnuts.  Stir well.

    Grease a 9 x 9 x 2-inch baking pan; spread batter evenly in pan.  (I think in hindsight I would try to bake them in a foil lined pan.  I've found it is so much easier to remove bar desserts this way.)

    Bake at 350 for 30 min or until done.  Cool and cut into about 30 squares.  Can be frozen.


    The consensus was that they were really tasty.  But I just don't think they meet my standards of the ideal brownie (i.e., the ones my mom made while I was growing up) so I will continue baking brownies.

    Monday, June 11, 2012

    Turkey Breakfast Tacos


    Two back stories:

    (1) I LOVE breakfast for dinner; especially on Sundays.  My mom made many homemade biscuits, sausage and eggs for dinner after church growing up through when my husband I and lived with them for a year.

    (2)  Awhile ago my husband suggested we cut back on the amount of red meat that we eat.  I have to admit, most of my best recipes call for ground beef so I thought this would be near impossible.  It has been a fun challenge to substitute different things for beef.  Turkey is an obvious choice and it is so easy to find now.  Our favorite local store has even begun stocking their own turkey which is a moneysaver over national brands.  I could not tell a difference in this recipe between the turkey sausage and regular sausage.  Delicious all around!  (As far as cutting back on red meat: I don't know how much of a difference it's made health-wise, but I don't miss it at all.  In fact eating red meat now tastes a little strange!)


    Ingredients:

    Turkey Breakfast Sausage
    12 large eggs
    1/2 t salt
    1/2 t black pepper
    1 c cheddar cheese, shredded
    6 large tortillas

    In a large non-stick pan, crumble and cook turkey until no longer pink.  Remove from pan.  Wipe pan clean and reserve for cooking eggs.  Break eggs into a large bowl and whisk until yolks and whites are well blended.  Season with salt and pepper. Pour eggs into reserved pan and scramble until desired doneness.  In order, top each tortiall with turkey, cheese, eggs and salsa. Fold and serve.

    Monday, June 4, 2012

    "BLT" Salad


    This recipe is fantastic!  Even my husband (who, shall I say, is less enthused about salads than I am) thought it was delicious.

    Serves 4
    Made in 10 minutes

    10 slices turkey bacon
    1/4 c each buttermilk ranch salad dressing and plain greek yogurt
    2 T water
    5 oz bag salad mix (I used the Spring Mix)
    1 pint grape tomatoes, halved
    1/4 c thinly sliced red onion
    4 slices whole-grain bread, toasted, cut into bite-sized pieces

    1.  Cut bacon into small pieces.  Cook in a large skillet as package directs.

    2.  In a large bowl, whisk dressing, yogurt and water until smooth.  Add salad mix, tomatoes, onion and half of the bacon; toss to mix and coat.

    3.  Transfer to salad plates; top with remaining bacon and croutons.

    Sunday, October 9, 2011

    Strawberry Lemonade Birthday

    I created a Pinterest account shortly before my daughter's second birthday and, in collecting ideas for her party, I started to notice I was liking the same things: cupcakes, pink and strawberry lemonade. Her birthday was in August and somehow Strawberry Lemonade just fit. So that became the theme for her party.

    I was all about going simple this year. The guest list pared down to family (which still amounted to quite a few people!) and the menu being dessert only. I bought a dozen pink and yellow balloons. My daughter is obsessed with balloons so I knew they would be a hit with her. I found some pink streamers in my party supplies. And luckily, I had leftover pink plates and napkins from her first birthday party.

    Here she is eating her homemade mac 'n cheese birthday dinner before the guests arrived. (By the way: we kept the streamers and balloons around for several days after her party. She loved them!)


    I found this recipe for lemonade cupcakes and they were so delicious! I turned them into pink lemonade cupcakes by using pink lemonade concentrate. Also, I finally learned how to decently decorate a cupcake as well. I used a 1M swirl tip and hot pink Americolor food coloring. Holy cow, food coloring really does make a difference. This brand is so much better than Wilton! (Sorry, Wilton.) I looked for a giant "2" candle and the store was out so I had to improvise. But I actually think the cupcake tree turned out better this way.


    And what's a strawberry lemonade party without strawberry lemonade? This is Emeril's recipe via Everyday Living. It is easy and good! In fact, I nearly missed getting a picture of it at all: it was disappearing rather quickly.


    Here's my daughter gearing up for the goods.


    She went straight for the frosting. Love the pink mustache.

    Saturday, October 8, 2011

    Golden Graham S'mores

    It's not often that my husband brings a recipe home to try. He was absolutely raving about these so I made no delay in buying the ingredients. I joined a greater part of the "watching General Conference in my pajamas" community (who also spend their conference weekend baking) and made these Sunday morning.

    Super easy and SO GOOD! They might just divert my obsession for Rice Krispy treats.

    I had to give them away or I would have literally eaten the entire tray myself. See, I couldn't even wait to try them before I took a picture...


    Here's the recipe:

    ~Ingredients~
    10 oz miniature marshmallows
    6 single serving Hershey bars (the normal size)
    5 T butter
    1 t vanilla
    8 c Golden Graham cereal

    ~Directions~
    Place chocolate bars in freezer, and chill well (I left mine overnight.) Once the bars are very chilled, mash them (I used the flat side of a meat-mallet) and then unwrap them. Place broken candy bars in a bowl and put back into freezer.

    Butter a 9x13-in. baking pan. Melt 5 c of marshmallows and butter in a large saucepan (as in big enough to also hold the 8 c of cereal) over low heat. Stir occasionally.

    Once the marshmallows have melted, remove pot from stove. Add in cereal and mix well. Add in your remaining 1 c of marshmallows and the chocolate bar pieces. Smash mixture into buttered baking pan and place pan in refrigerator. Cool completely before serving.


    These have me imagining other cereal-marshmallow concoctions...

    Friday, October 7, 2011

    Cinnamon Toast

    According to the Pioneer Woman, I have been making Cinnamon Toast incorrectly for the last 25 years of my life. No, seriously. Her recipe is AMAZING! (And in case you are wondering, I have always used Approach #3. And I'm feeling sort of guilty about it.)

    So it was one of those evenings when my hubby was at the firestation and I didn't really feel like putting a lot of effort into dinner. However, I didn't really feel like reheating anything either.

    This toast is the perfect accompaniment to one of my favorite dinner fallbacks: breakfast for dinner. Scramble some eggs and slice some fresh cantaloupe and you're good to go!


    It's always a bonus when my daughter likes what we're having for dinner!

    Friday, July 1, 2011

    Peanut Butter Fudge

    Hey, looky there! I do still post on this blog!

    Okay, so since I've done nothing crafty whatsoever since Mother's Day, I haven't really had anything to post about.

    I did, however, make some delicious Peanut Butter Fudge.


    I failed to get a picture before they were all gone, so the above image is from Jif.com. Actually, the recipe is courteous of Jif, too!

    I like peanut butter, but I don't love it. These, however, were pretty good. I rarely buy name brand products when they publish recipes (as in Jif's) case, but I thought I would splurge and buy the real thing. I don't know if it made a difference, but I'd like to think it did! They took hardly any time to make. Try them yourself!

    Word of advice: cut the squares into very small pieces! They are really rich!

    Sunday, May 1, 2011

    Linguine with Asparagus and Egg

    I grew up sort of iffy about my feelings for eggs. I might eat them. I might not. But if I did have them they were always for breakfast and they could never touch any food that was served alongside them.

    Then, one day, our friend who raises chickens and has farm-fresh eggs introduced me to a hamburger with a fried egg. This intrigued me so I though I would at least give it a bite. It was AWESOME! That turned a new chapter in my life and I found myself trying new concoctions, like egg and pancake sandwiches.

    Which is why I had to make Linguine with Asparagus and Egg from the April issue of Everyday Food.


    I thought it was delicious and a good way to use up some leftover asparagus from a previous meal. Even my 20 month old liked it. Give it a try, and long live the incredible, edible egg!

    Sunday, April 3, 2011

    Ricotta Mini Cakes

    I don't really like ricotta. I grew up with cottage cheese as the substitute in ricotta recipes. However, I caved and bought ricotta for a recent meal I made. It didn't use much so I was left with a lot of leftover ricotta. I tried to trick my daughter into thinking it was cottage cheese. She didn't fall for it.

    I was sifting through some older recipes I had collected when I found this recipe for these cookies. I figured it was good way to use up that extra ricotta but didn't expect that THEY WOULD BE SO GOOD!


    Ingredients

    2-1/4 c all-purpose flour
    1 t baking powder
    1/2 t baking soda
    1/8 t salt
    1/2 c unsalted butter, softened
    1 c granulated sugar
    1 egg
    1 c ricotta
    1 t vanilla extract
    2 c confectioners sugar
    3 T milk

    Directions

    Heat oven to 350 degrees F. Prepare two baking sheets with nonstick spray. Whisk flour, baking powder, baking soda and salt together; set aside
    Beat butter and granulated sugar together until blended. Add egg, ricotta and vanilla, beating until combined.
    On low speed and dry ingredients and beat until blended. Drop by tablespoonfuls onto prepared pans. Bake until lightly browned around edges (my oven took 15 min.) Let cool 3 minutes on sheets then remove to rack to cool completely.
    Beat confectioners sugar and milk together until well blended. Dip tops of cooled cookies into glaze and set aside until glaze is hardened.

    These cookies only have a shelf life of about 2 days and then they start to dry out a little bit. My solution for this is to take them to a firestation for your husband and his hungry coworkers to polish off.

    Tuesday, March 1, 2011

    Lion and Lamb Cupcakes

    Happy March! To celebrate getting to one of my favorite months of the year, I thought I would make Lion and Lamb cupcakes to go along with the old adage In Like a Lion, Out Like a Lamb.

    Let's hope that is the case, anyway!

    I found this idea on FamilyFun.com. Recipe and instructions are here.

    Here is my version.


    The lions look pretty close to the original.


    However,

    the lambs do not!


    This recipe calls for the Hershey Swoops candy for the head. I could not find these (I don't even know if they make them anymore) so I used miniature peppermint patties instead. Also, the recipe calls for jelly beans, but apparently I should have used itty-bitty jelly beans because, as it is, I cut the jelly beans in half and they were still enormous. Finally (and I just discovered this one after looking at an enlargement of the original) the recipe calls for mini nonpariels, which I used. The original, however, uses those white nonpariel-covered chocolate chips. It makes a big difference! So I am a little frustated by the inaccuracy of the directions, and at my inability to spot these inaccuracies before I started making the lambs. Hopefully I will have spared the same frustrations to any readers who decide to make these themselves.

    They do make pretty cute teddy bears, though.

    Sunday, February 6, 2011

    Go Steelers! And have a cookie.

    I married into a big Steelers family, so it is fun to have a reason to watch the superbowl this year.

    I thought I would celebrate by making cookies. Cookie decorating is one of those things that I love to do but haven't quite mastered yet. I look for tips anywhere I can. This time around I found some new recipes for the cookies and frosting from my favorite baking blog. (Check her out, she's awesome!!)

    Once my cookies were baked and cooled, it was time for the fun part!

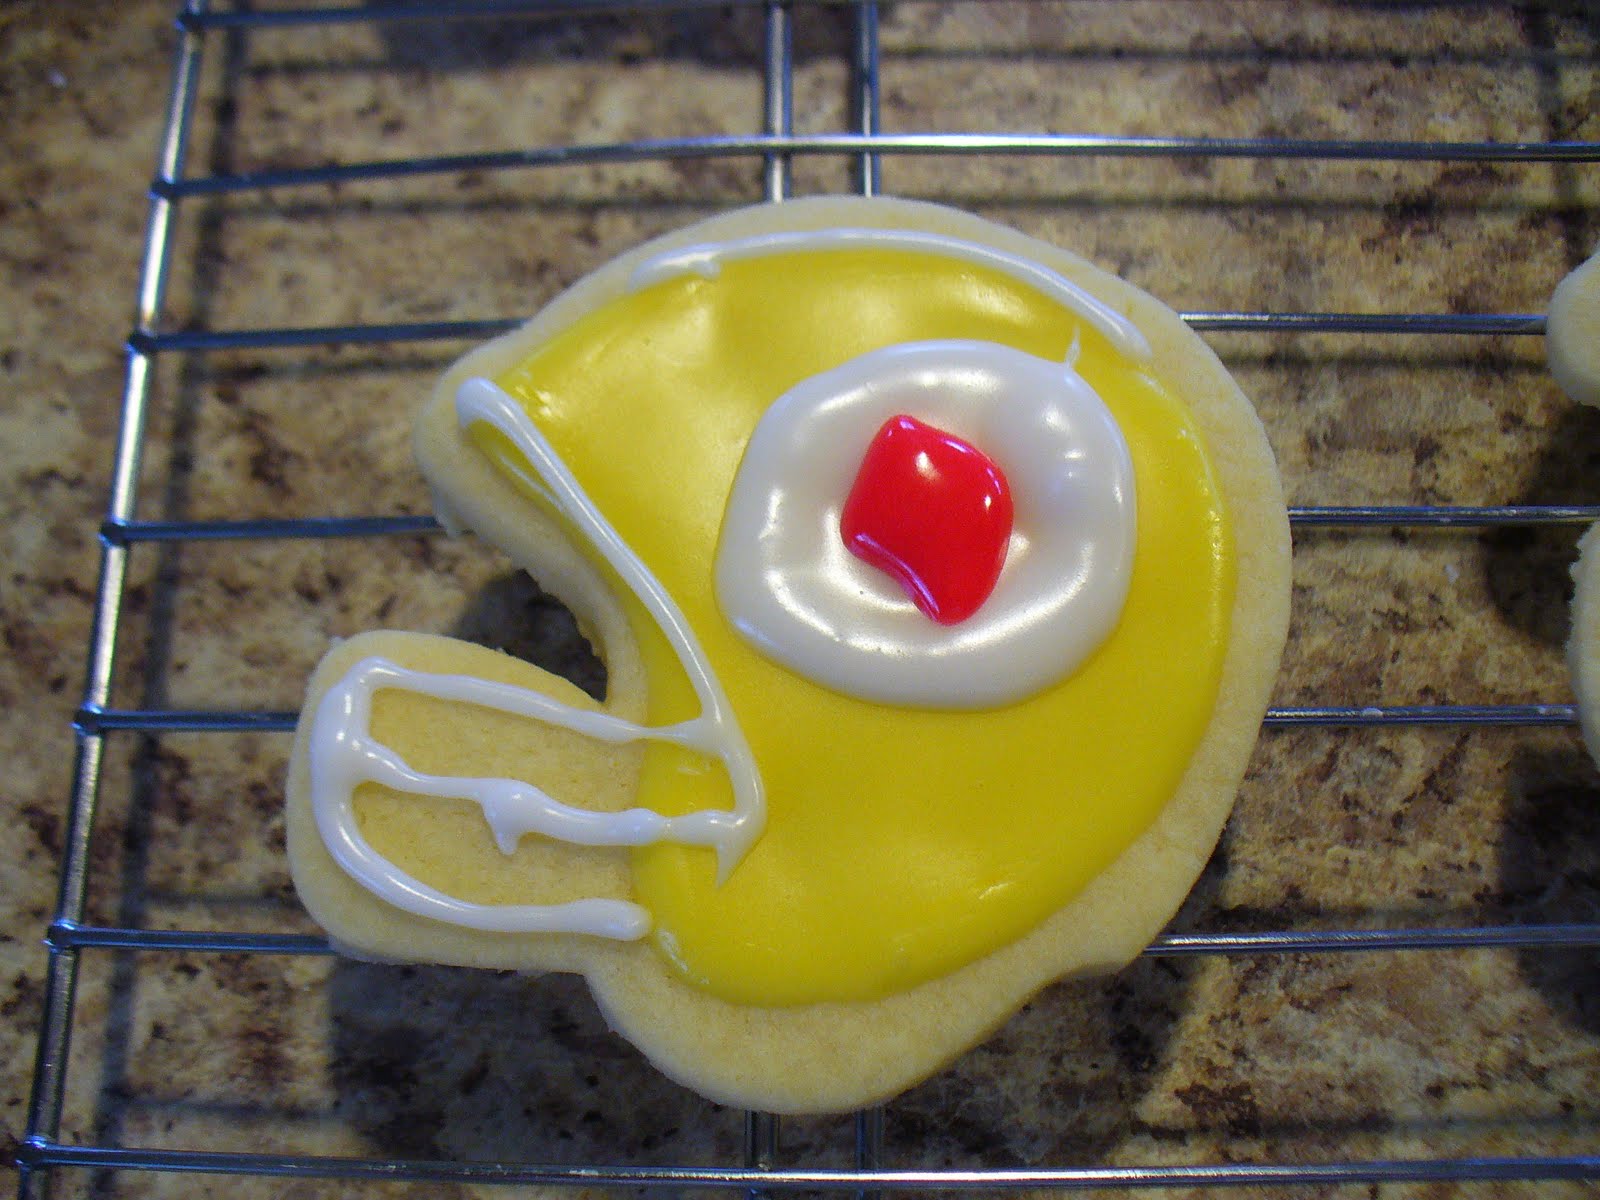
    First I found a picture of a Steelers helmet (that wasn't black--I cannot figure out how to make a decent black frosting.) I printed it out (only to realize that our non-photo printer doesn't have any color ink in it) and made some sketches and notes. This was the first time I'd done real prep work; I usually just wing it. It made a big difference having a map to follow.


    Here's a picture of all of my cookies lined up and ready to go. I've found it helps to keep them on the cooling racks. They are slightly elevated so that, if frosting does run off, it won't pool around the cookie.


    And here are the finished products.

    The football:

    And the helmet. Due to size limitations, I ended up opting to do only the red star on the helmet.


    And here they are all together! Ready to be gobbled up by some hungry Steeler fans. I'm very proud that only one didn't make it to the party. I could have done some serious eating last night!!