Showing posts with label Crafty. Show all posts

Monday, November 26, 2012

Hot Chocolate on a Stick

Merry Christmas!

I have 2 secrets:

(1) I made these 2 years ago and never posted about them
(2) I'm actually writing this up at the end of May and it is currently 80 degrees outside.  You should be jealous.  Don't worry, I am too.

I wrote down all of the instructions on this blog after I finished making these Hot Chocolate Sticks, assuming I would get to adding pictures soon after.  It never happened.  Then today (May 20th, 2012) I noticed that there was still a draft hanging out on blogger.  So I figured, what the heck.  I love the schedule option on Blogger.

I needed something fast, cheap and easy to make for 2 dozen coworkers (this was back when I still made handmade gifts for them) and I found this great idea online to make Hot Chocolate on a Stick.  Basically, you make a chocolate lollipop and melt it in hot cream or milk, making a yummy cup of hot chocolate.  I thought I'd give it a shot.

Here's what you need:


  • a ziploc bag
  • lollipop sticks
  • an ice cube tray
  • 8 oz high quality chocolate (as you can tell, I used Ghiradelli.  Yum.)
  • 1/4 c cocoa powder
  • 1/2 c confectioner's sugar
  • a pinch of salt
  • white chocolate baking morsels
  • crushed peppermint candy

Melt the chocolate:


Sift the sugar and cocoa into a small bowl and set aside.


Break the chocolate into small pieces.


Heat some water to about 90 degrees (I don't know why this exact temperature is important, but I do know that chocolate can be fickle.) Place a bowl with the chocolate over the water.  (This method works so well that I will never buy a double boiler.)


Stir until 2/3 melted.


I must show you a step-by-step of this happening.  Makes me drool a little.  Especially considering that as I am writing this I am 33 weeks pregnant.


Take bowl off of water and continue stirring until completely melted. Make sure no water gets into the chocolate mixture at all. 


Slowly stir the cocoa/sugar mix and the pinch of salt into the melted chocolate until you get a smooth consistency.  If I remember this was a lot more difficult to do than it sounded.  I had to stir for quite a long time before the consistency was right.  I also used a whisk instead of a sifter which may not have made the cocoa/sugar mix as fine as it needed to be.  Since then I have acquired a sifter.  I would recommend you do the same if you don't have one.  :)


Fill the molds with Hot Chocolate Mix.


Spoon this into a ziploc bag.  


Cut the corner off.  This is such a great way to not only fill chocolate molds, but cupcake liners as well.  EASY TO CLEAN UP!


Fill the ice cube try with the chocolate; this recipe makes about 10 cubes. Shake the tray back and forth or tap it on the counter to make the tops even out.


Let the mix form:


Leave the ice cube tray for a minute or two. Now put one stick into each cube. Hold them for a second or two; they should stay in fairly easily. Leave the tray on the counter and let them harden for a few hours. After set, they should come out easily.


Decorate the hot chocolate sticks:


This part is optional.  I decided to dip these in melted white chocolate and crushed candy cane.  I also added a candy cane and a few Christmas themed marshmallows in the bag.


Make Hot Chocolate from the stick:


Pour 3/4 c of milk or milk with cream into a mug and heat in the microwave for 1 to 1-1/2 minute. You want it warm enough to melt the chocolate.  Don't forget to include instructions for the recipient as well!


I test-tasted one of these before handing them out.  It was a very rich cup of cocoa.  I think the only thing I would have changed is I would have used a sweeter chocolate to begin with.  But I prefer sweeter chocolate over bitter chocolate.

Monday, July 23, 2012

Have you tried...


At Spark last fall, one of our classes was on felting soap.  Totally random.  It was also probably the class I did the worst at.   P.S. that is supposed to be a flower on top.  I know...

The technique basically involves taking this super-fine wool and wrapping it over and over again around a bar of soap using nothing but your hands and a basin of water.  It sounds easy but it was kind of a pain because just as I would get it in place, it would start to unravel and I would have to start over.  But my hands got really clean.  Which was probably a good thing considering I did a lot of painting and mixed media that weekend.

Anyway, I tossed it in my bin of soaps and such and kind of forgot about it until a few weeks ago.  I decided that I would never give it away and it was just sitting there...so I figured what the heck and started using it myself.

Supposedly the wool is supposed to act as a natural exfoliant or something, but to be honest I can't really tell a difference and, although it lathered extremely well at Spark while I was making the darn thing, it hardly lathers at all when I really need it to :)

So my review: skip the felted soap and pick up a loofah instead.

Sunday, November 20, 2011

Birthdays are fun!

I am blessed to know some very creative people!

My birthday started out with french toast made from Kneader's Chunky Cinnamon Bread. YUM!


I love this gift from my coworker!


Another coworker brought these awesome S'mores Cupcakes (if I get a source, I'll link it here.)


This was fun: another coworker found 30 facts from 1981:


and filled a bag with several items--30 of each. So creative!


And possibly my favorite crafted-for-me-item ever. My husband made me a card this year. He said he went into my craft room and was overwhelmed by all of the supplies, so he just started grabbing things and sticking them on. To paraphrase him, he ran out of a glue stick and ended up Modge-Podging the whole thing and Modge Podge gets everywhere, apparently. I absolutely love it; I think he did a terrific job!


Ladies: he's mine :)

Monday, October 31, 2011

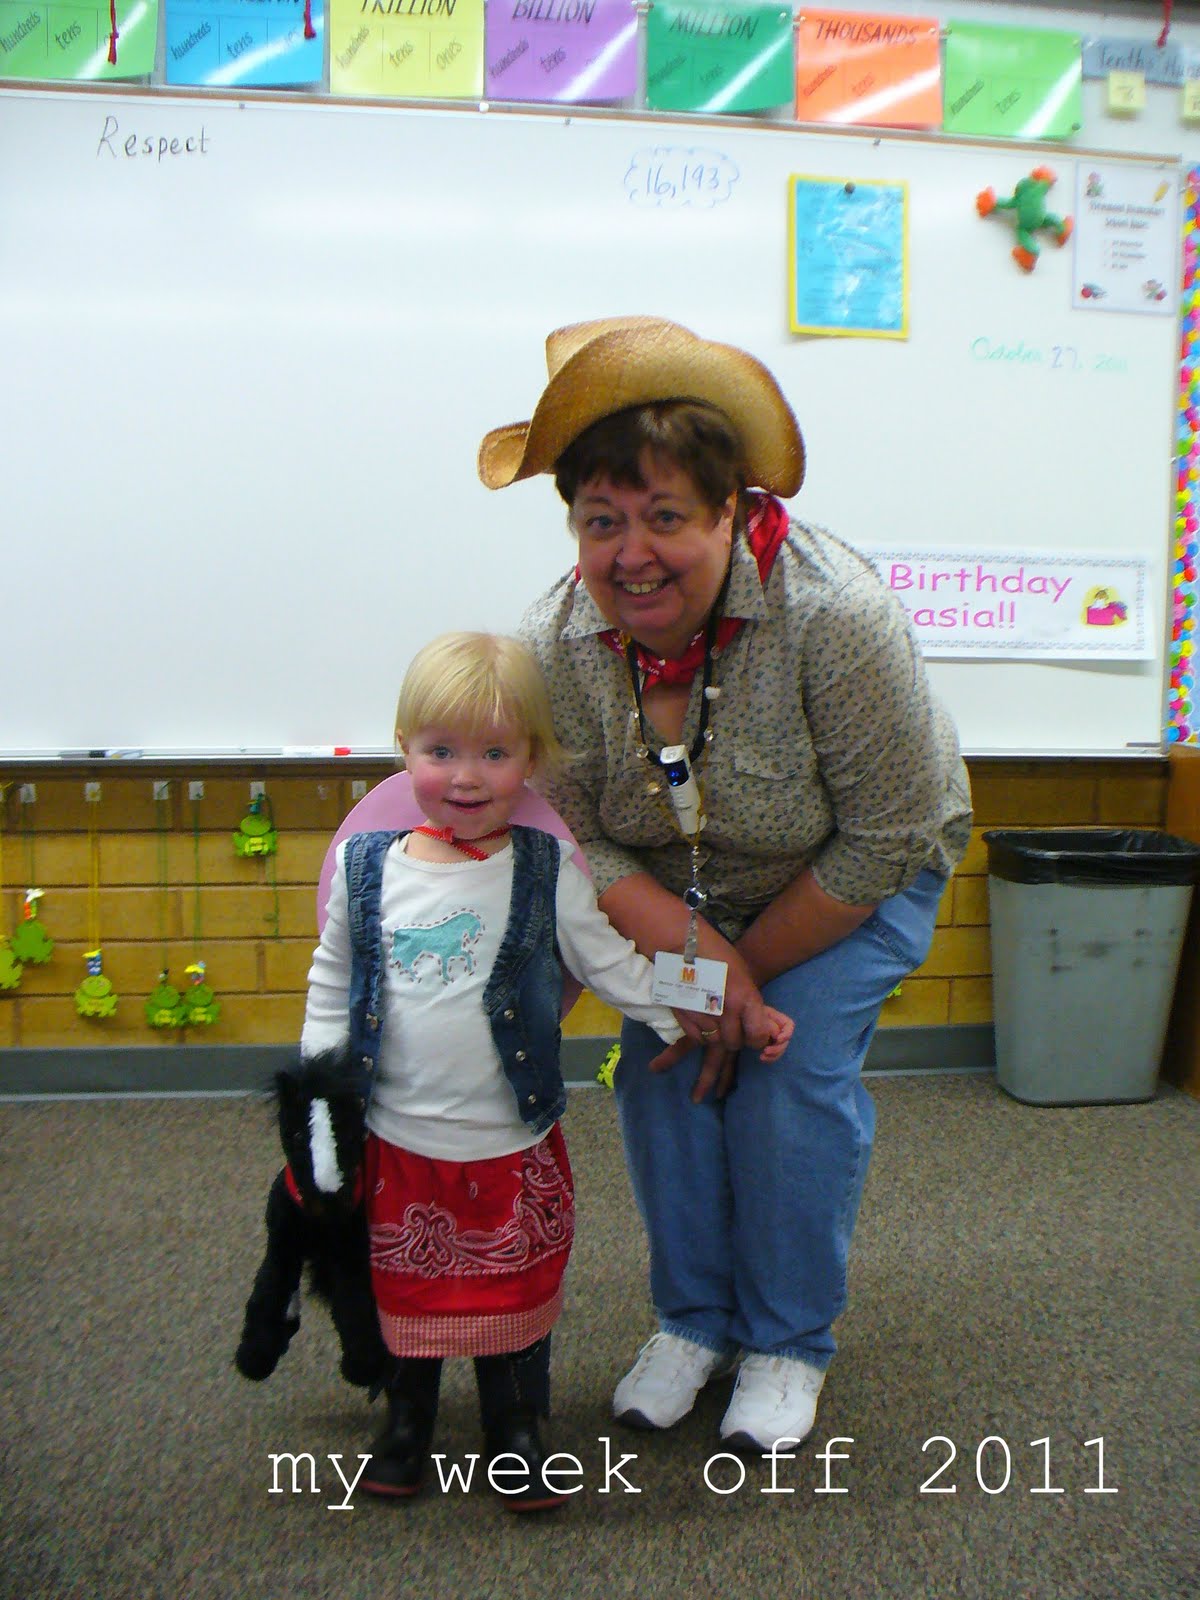
Cowgirl Costume

Happy Halloween!

This year's costume for my 2 year old happened a little bit by accident. I bought the denim vest (seen in the picture below) from Old Navy for my daughter's 2 year birthday pictures. I don't normally spend so much on an item of clothing that will be outgrown so quickly, but in this case, I am glad I did because it really made the outfit.


Afterwards, I was sort of complaining about the cost vs. length-of-time-before-it's-outgrown issue to a friend from work. She suggested I make my daughter a cowgirl for Halloween. It was like a bell went off in my head: "Ding Ding Ding!"

The first thing I knew I wanted to do was to make a bandanna skirt. I had seen these before and I thought it would be the perfect cowgirl skirt. I found a great and easy pattern here. It is the easiest thing I have ever made. Seriously, it took me 20 minutes. In fact, when I was at Hobby Lobby I saw all sorts of cute patterned bandanas that I thought I would make into some play clothes for her as well.

Anyway. Here is the finished product.


And here is my daughter modeling the 2-inch fabric length I sewed to the bottom. Adding fabric at the bottom makes it possible to make this skirt for any young girl. The taller they are, the more fabric you add. Love it!


I knew we would be doing a reverse applique class at SPARK this year (trust me, I will be blogging more about SPARK!) I went prepared with a template of a horse and a toddler's t-shirt from Target. It turned out even better than I could have imagined! The designer Amy Tangerine taught the class (she is so inspirational!) and I was on cloud 9 when she liked my design!


Next up, and probably my favorite part of the costume are the boots. These were a small source of stress at first because real cowboy boots (for a toddler, even) were $55! Yikes! My husband and I agreed that she could just wear her Sunday shoes, but deep down I really wanted her to have cowboy boots. So I headed to our local thrift store to see what I could find. They didn't have any cowboy boots, but they had these.


You're probably thinking: not even close. I did too. But I knew I could figure out a way to make them work. Then I found this embossed felt at Hobby Lobby. I thought it looked just like leather from a distance. Then the wheels in my head started spinning...


Through trial and error (sorry, no template here) I just started cutting away the felt until each piece looked like the top of a cowboy boot. Then I hand sewed the two pieces together. It still needed something, so I grabbed another bandanna I had purchased and cut out little squares and stitched them on.


Then I slid each piece over the top of each boot. The best part is there is no glue involved so I can just slip them back off and reuse the boots (which, by the way, are in awesome condition. I still can't figure out why they ended up at thrift shop, but I'm sure glad they did!) Here are the finished boots. Pretty close, huh?!


Next she needed a hat. I found these cute foam hats at Hobby Lobby and I thought the pink seemed more like my daughter. I stitched some gingham ribbon around the base and added a hand-sewn flower made out of a strip of bandanna (another skill I learned at SPARK this year.) I made an quick chin strap out of some red ribbon.


And what is a cowgirl without a horse? I found this horse on the same trip to the thrift shop. It had a red bandanna around it's neck with a Wells Fargo logo. That seemed easy enough to fix. After a good bath, I attached another hand-sewn flower to his bandanna. And he's ready for trick-or-treating now!


This was the most fun I've had preparing for Halloween. It's also the first costume I have ever made from scratch (minus the vest, of course.) I have been hesitant to sew costumes before because you can buy them so cheaply! But this entire costume came together for far less than I could have expected. Here's the breakdown:

Vest: originally $20 but fair to say repurposed in this case, so $0
Skirt: $1 for the bandanna, $1 for the fabric hem, $2 for the elastic, so $4
Shirt: $6 at Target, $350 for the class (okay, we won't count that one)--$6
Black tights: already owned--$0
Boots: $3, felt was $0.50 a sheet (at 2 sheets) plus another $1 bandanna which I also used for the flowers (owned the thread)--$5
Hat: $3 plus $1 ribbon on sale (owned the ribbon for the chin-strap)--$4
Horse: $0.50

That's an entire costume for just under $20. And not only was it fun to make but each piece (minus the hat) can be reused--or played with--post-Halloween.

Finally, here is my daughter in her costume at her Grandma's school parade!

Sunday, April 24, 2011

Easter Treat

I always have grandiose plans when it comes to holidays. However, this year I was smart enough to realize that I didn't have time for grandiose and therefore wasn't disappointed when I didn't get around to what I had planned on doing.

I did still want to make a little treat for a few special people.


I found these Snicker's eggs on sale (plus I had a coupon--bonus!) I had my daughter choose a sheet of paper at the scrapbook store. You can't see it here, but it is a pastel blue with yellow flowers. Then I stamped on the other side with this cute chick stamp that I already had and handwrote the sentiment. I gave them to her to color again but only a few were colored before she lost interest. Bakers twine seems to be super popular in the crafting corner of the world (and at 6 cents a yard I got a bunch!) So I used it to complete the project.

I asked my daughter to hand the eggs out and in most cases she ripped off the tag and handed the candy to the recipient. Oh well, it would have been ripped off eventually anyway!

Sunday, April 10, 2011

Lunch boxes repurposed

We do take out lunches at work. One of my favorite places to go is Skool Lunch. Not only is their food yummy, but they send your lunches in these cute little boxes. I couldn't just throw mine away. So I decided to turn a few of them into boxes for storing craft supplies.


*I thought they chose an interesting way to spell my name. Twice. Although Skool isn't exactly spelled correctly.*


I entirely used supplies I had on hand. And most of them were in my to file basket so I didn't even have to look that hard! I cut the new labels just slightly bigger than the existing labels so I didn't have to struggle to get them off. Emeli still exists somewhere under there...


The flowers on the label are flowers from the cardstock used on the main portion. I found a small piece that I would have just thrown away. If you look closely you can see the the majority of the flowers aren't even whole. Another case of making the most out of your supplies!


I think this one is my favorite. I had no idea where I was going with it when I started. Sometimes those end up being the very best projects. Other times they completely flop. But in this case I think it turned out.

This was a great lesson for me on thinking outside the box (pun intended.) It definately makes me think twice before throwing anything away!

Sunday, February 13, 2011

Valentines Box of Chocolates

I saw this idea from somewhere, some time ago...except for the chocolates were lined up in a cellophane bag with an embellished bag topper. I thought it would make a fun Valentine gift for the grandparents and my sweetheart. And I put mine in boxes.


If you want a tutorial, keep reading.


I bought a few bags of the Hershey Nuggets chocolates. This shape lends itself well to the project.


Take any pattern of scrapbook paper that you would like. I chose Valentine's themed, of course. Cut into 1-inch strips.


Then cut those 1-inch strips into 3-inch sections.


This size fits perfectly around the candy bars. It took awhile for the glue to dry so I had to set each one in a clothespin, but they turned out pretty cute.


Then I found these Wilton treat boxes at Michaels.


I started decorating them a bit. Then my daughter got a hold of the paper and started coloring on it. My inner OCD began to panic until I realized it was, after all, a present for the grandparents and would be treasured that much more.


Here's my cute little helper. She sure loves mommy's craft room! And she's pretty good at this stuff for only being a year and a half old.


I lined 24 candy bars up in each box. And again after my daughter took them all back out.


Here are the finished products! (The orange crayon is my daughter's artwork. She also contributed with the hearts and flowers.)


And a close-up again of the finished product.


This was fun but a little time consuming. I think next year I'll go back to my cookies :) But I did like how the little candies looked peeping through the window.

Monday, January 24, 2011

Valentine Garland

After two weeks (and I'm not exaggerating!) of almost nonstop sorting, organizing--and reorganizing after my daughter "helped", my craft room is 99% done!

99% done was good enough for me to pull out a Valentine's Day project. This one was easy-as-pie, which was exactly what I was in the mood for.

The instructions can all be found at Martha's website so I won't post them here. Seriously, this project only took me 10 minutes to do and it so very festive!!