So this post really started out as a post about Flower Gems and then turned into a whole "look how crafty our transfusion department was for lab week" thing.
Flower Gems (aka red blood cells)
These things are SO COOL! My coworker initially found them to make a string of lights to run down the middle of the lab. All you do is add water to these tiny, bead-like polymers and they expand to fit their space which, in this case, was test tubes. Next she popped a light into each tube and this was the result:
The obvious thing to do with these flower gems was to experiment. I am, after all, a scientist. I placed one gem in each well of an ABO reagent plate (we use for automated testing, I use for science)
and added water.
I really hoped that each of these beauties would erupt out their well, but alas they conformed to their space and no further. Either way, they are still awesome and I can't wait to buy some of these to play with at home.
Tissue Paper Poof Balls (aka white blood cells)
Another coworker of mine made thousands of these for her wedding...so she volunteered to make a few more for our lab week decorations. They are are also super awesome! You take a square of tissue paper, fold it accordian style, gather it in the middle, and then poof it out. Then, if you are the only guy in the department sick of working with craft-hungry chics, you place said poof ball on your head. And see if anyone notices.
Bruce, the Hemolygator
I received some parts to do a quick repair on an instrument of ours. When I was done, I was cleaning up and about to throw the packaging when I paused, looked at it, and thought: that looks like an alligator. So I found a few pom-poms and drew on a nose. Then a coworker thought it should be named Bruce and eat red blood cells. Then another coworker thought "if it eat's red blood cells, it should be called a hemolygator." So that's how Bruce, the Hemolygator and transfusion lab week mascot was born. He's still around. I dare anyone to throw him away.
Cookie Differentials
This is actually the second time we've done this. The two ladies in the picture were the originators along with myself and another who no longer works here. I think we are also the only ones who participated in this--which is too bad because it is only the best activity that we have done. Ever. Basically, you decorate cookies to look like different types of red or white blood cells seen on a cell differential (a hematology test.) We had to do thousands (an exaggeration? I wish...) while we were students. It's fun to know all our hard work paid off when we get to use our knowledge in fun ways.
Here are mine for the year: a megakaryocyte (which would have looked so much more awesome with whoppers instead of raisins,) a howell jolly body in an erythrocyte, a lymphocyte with an inclusion which I can't remember (but I'm sure this all sounds like latin anyway, so it doesn't matter) and a neutrophil in a patient with Chediak Higashi syndrome.
The best part is being able to eat them.
Monday, May 13, 2013
Monday, May 6, 2013
Volcano!
For preschool a few weeks back, we had a Luau theme. It was really anything related to Hawaii but the other 'L' themes (from the site I get my theme ideas from) seemed sort of Lame. haha... So Luau it was. We learned about beaches and oceans too. My daughter seemed to really like it.
The part she liked best, however, was SCIENCE! That 'a kid. Naturally, we had to make our own volcano. I'm sure every parent in america remembers doing this when they were kids, even going so far as to build a paper mache cone and awaiting anxiously the "lava" that erupted. Every parent but me, that is. I had never done this before. So it was a true science experiment for both of us.
Rather than go the fancy paper mache route, we just used an old sparkling cider bottle that we had. Luckily I had the foresight to put the experiment in an easy-to-clean mixing bowl.
I put a few table spoons of baking soda in the bottle, along with a few drops of food coloring for effect. I added the vinegar and waited for the explosion, and...nothing. Not at all worried, I grabbed the bottle, put my thumb over the hole and shook it up a little bit. Then I poured in A LOT of vinegar and the lava started to flow! My daughter was so excited!
Okay, I was a little excited too!
The part she liked best, however, was SCIENCE! That 'a kid. Naturally, we had to make our own volcano. I'm sure every parent in america remembers doing this when they were kids, even going so far as to build a paper mache cone and awaiting anxiously the "lava" that erupted. Every parent but me, that is. I had never done this before. So it was a true science experiment for both of us.
Rather than go the fancy paper mache route, we just used an old sparkling cider bottle that we had. Luckily I had the foresight to put the experiment in an easy-to-clean mixing bowl.
I put a few table spoons of baking soda in the bottle, along with a few drops of food coloring for effect. I added the vinegar and waited for the explosion, and...nothing. Not at all worried, I grabbed the bottle, put my thumb over the hole and shook it up a little bit. Then I poured in A LOT of vinegar and the lava started to flow! My daughter was so excited!
Okay, I was a little excited too!
Tuesday, April 9, 2013
I peruse a lot of blogs (and I mean a lot) on my downtime at work: craft blogs, mommy blogs, food blogs...and it leaves me a bit discouraged. I have zero (like, literally) downtime when I am at home. (Okay a slight exaggeration--but I've been saving that spare 45 minutes an evening to watch the Office with my husband. I call it my golden time.)
Anyway, I collect countless things on Pinterest that I am going to do "some day." Only recently have I truly started to accept that my kids are my job right now (I know--2 kids in and I'm just barely figuring this out) and that everything else is just going to have to wait.
I'm not abandoning this blog: I am still slowly getting my craft room put together piece by piece (it actually looks really good!) and I do still love to bake with my daughter, but I just have very little that is exciting enough to share. As if my post on short ribs weren't a good indicator :)
One of these days I'll take a picture of the pegboard my husband built for me. It is awesome. And pretty. Pretty awesome.
Anyway, I collect countless things on Pinterest that I am going to do "some day." Only recently have I truly started to accept that my kids are my job right now (I know--2 kids in and I'm just barely figuring this out) and that everything else is just going to have to wait.
I'm not abandoning this blog: I am still slowly getting my craft room put together piece by piece (it actually looks really good!) and I do still love to bake with my daughter, but I just have very little that is exciting enough to share. As if my post on short ribs weren't a good indicator :)
One of these days I'll take a picture of the pegboard my husband built for me. It is awesome. And pretty. Pretty awesome.
Monday, March 11, 2013
Slow-Cooker Short Ribs
I found some short ribs on sale at our grocery store last week (under $3!!) so I bought them but I didn't actually know how to cook them. I did a quick search on my phone and found a recipe for slow-cooker ribs. I have since then closed the webpage, but I'll try to remember it off the top of my head.
These are SO DELICIOUS! My husband said that it tastes just like the ribs he makes but he uses bottled Sweet Baby Ray's Barbecue sauce instead. Not that the mix was hard to make, but pouring it out of a bottle sounds much easier.
- 1/2 c ketchup
- 1/2 c honey
- 2 T Worcestershire sauce
- 2 cloves garlic (I used 2 t garlic powder)
- 1 onion (I didn't have one so I used dried onion)
- Boneless pork short ribs
These are SO DELICIOUS! My husband said that it tastes just like the ribs he makes but he uses bottled Sweet Baby Ray's Barbecue sauce instead. Not that the mix was hard to make, but pouring it out of a bottle sounds much easier.
Monday, March 4, 2013
Easter Banner
I started writing this post last year (which is why all of the pictures say "2012") but when I realized I was actually closer to this Easter, I decided to wait.
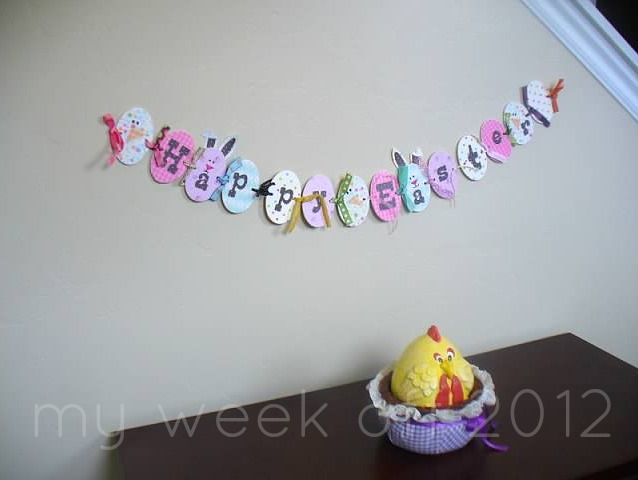
Our home seems to be lacking in decorations for all of the holidays besides Halloween and Christmas. I found a tutorial for making this cute banner for Easter.
I call this project a "breakthrough project" for me becuase I finally learned how to properly modge podge.
Exhibit A
Can you tell a difference?
Exhibit B
How about now?
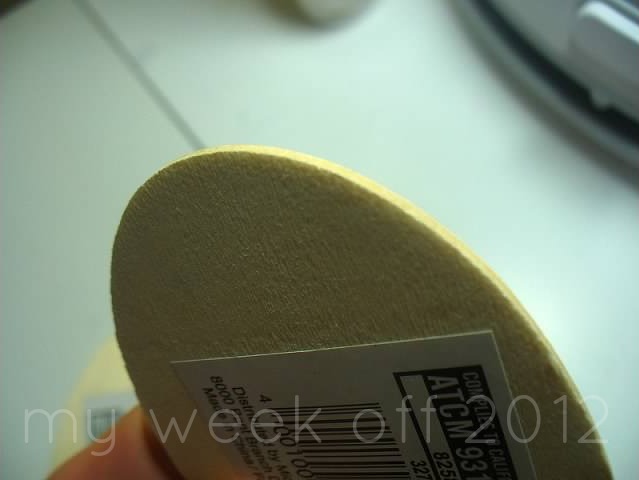
See, no one ever actually told me you were supposed to sand down the edges. It makes for such a neater finish. Since then, I have been much happier modge-podge ing.
Anyway, for this project I just bought a dozen or so ovals (or eggs) and modge-podged each of them with a different spring-ish colored paper. Then I cut out the letters to spell "Happy Easter" with my Slice. Then I freehanded paper pieces to make little chick and bunny faces. I had to use a heavy duty hole punch to cute holes in each egg and then I tied each of them together with a different color of ribbon. I think it turned out pretty cute, if I do say so. We'll see how it fared in storage from the past year...
Our home seems to be lacking in decorations for all of the holidays besides Halloween and Christmas. I found a tutorial for making this cute banner for Easter.
I call this project a "breakthrough project" for me becuase I finally learned how to properly modge podge.
Exhibit A
Can you tell a difference?
Exhibit B
How about now?
See, no one ever actually told me you were supposed to sand down the edges. It makes for such a neater finish. Since then, I have been much happier modge-podge ing.
Anyway, for this project I just bought a dozen or so ovals (or eggs) and modge-podged each of them with a different spring-ish colored paper. Then I cut out the letters to spell "Happy Easter" with my Slice. Then I freehanded paper pieces to make little chick and bunny faces. I had to use a heavy duty hole punch to cute holes in each egg and then I tied each of them together with a different color of ribbon. I think it turned out pretty cute, if I do say so. We'll see how it fared in storage from the past year...
Monday, February 25, 2013
Pesto Salad
I love finding recipes that my picky-ish daughter will eat. Even better when I like them. Even better when they are actually good for you! I found this one here.
Pesto Salad with Chicken, Feta and Tomatoes
- 1 pkg bow tie pasta
- 1 T olive oil
- 1 c basil pesto
- 1/4 c Italian dressing
- 1 c grilled chicken
- 2 c spinach
- 1 pint cherry tomatoes
- 1/2 feta cheese
- Cook the bowtie pasta according to package directions in a large pot of salted water. Drain the pasta. Drizzle with olive oil and stir around.
- Put the pasta in a large serving bowl and stir in the pesto and Italian dressing. Add the spinach, cherry tomatoes and feta cheese. Toss to combine. Salt and pepper to taste.
- Cover the pasta and refrigerate. If the pasta seems dry before serving, you can stir in another tablespoon of olive oil.
Monday, February 4, 2013
Rocky Road Brownies
Alright, maybe my quest for the perfect brownie isn't over quite yet.
These were good, but messy. USE NONSTICK FOIL. And lots and lots of nonstick cooking spray, otherwise you'll lose half of the brownie to the pan.
- 2/3 c unsweetened cocoa powder
- 1/2 c all-purpose flour
- 1/2 t baking powder
- 1/8 t salt
- 1/3 c canola oil
- 1/3 c granulated sugar
- 1/3 c packed light-brown sugar
- 4 egg whites, lightly beaten
- 2 t vanilla extract
- 1/2 c finely chopped walnuts
- 1/4 c mini chocolate chips
- 1/2 c mini marshmallows
- Heat oven to 350. Line an 8 x 8-inch baking pan with nonstick foil, overhanging ends of pan.
- In medium-size bowl, combine cocoa powder, flour, baking powder and salt. Set aside.
- In a large bowl, whisk together oil, sugars, egg whites and vanilla. Stir in cocoa mixture. SPoon batter evenly into prepared pan. Sprinkle walnuts over batter. Bake at 350 for 25 minutes. Scatter teh chips and marshmallows over the top and bake for an additional 5 minutes. REmove from oven and cool completely.
- Tpo slice, coat a sharp chef's knife with cooking spray and cut into 25 squares, using a rocking motion. Re-spray knife frequently.
Subscribe to:
Posts (Atom)