I peruse a lot of blogs (and I mean a lot) on my downtime at work: craft blogs, mommy blogs, food blogs...and it leaves me a bit discouraged. I have zero (like, literally) downtime when I am at home. (Okay a slight exaggeration--but I've been saving that spare 45 minutes an evening to watch the Office with my husband. I call it my golden time.)
Anyway, I collect countless things on Pinterest that I am going to do "some day." Only recently have I truly started to accept that my kids are my job right now (I know--2 kids in and I'm just barely figuring this out) and that everything else is just going to have to wait.
I'm not abandoning this blog: I am still slowly getting my craft room put together piece by piece (it actually looks really good!) and I do still love to bake with my daughter, but I just have very little that is exciting enough to share. As if my post on short ribs weren't a good indicator :)
One of these days I'll take a picture of the pegboard my husband built for me. It is awesome. And pretty. Pretty awesome.

Tuesday, April 9, 2013

Monday, March 11, 2013
Slow-Cooker Short Ribs
I found some short ribs on sale at our grocery store last week (under $3!!) so I bought them but I didn't actually know how to cook them. I did a quick search on my phone and found a recipe for slow-cooker ribs. I have since then closed the webpage, but I'll try to remember it off the top of my head.
These are SO DELICIOUS! My husband said that it tastes just like the ribs he makes but he uses bottled Sweet Baby Ray's Barbecue sauce instead. Not that the mix was hard to make, but pouring it out of a bottle sounds much easier.
- 1/2 c ketchup
- 1/2 c honey
- 2 T Worcestershire sauce
- 2 cloves garlic (I used 2 t garlic powder)
- 1 onion (I didn't have one so I used dried onion)
- Boneless pork short ribs
These are SO DELICIOUS! My husband said that it tastes just like the ribs he makes but he uses bottled Sweet Baby Ray's Barbecue sauce instead. Not that the mix was hard to make, but pouring it out of a bottle sounds much easier.
Monday, March 4, 2013
Easter Banner
I started writing this post last year (which is why all of the pictures say "2012") but when I realized I was actually closer to this Easter, I decided to wait.
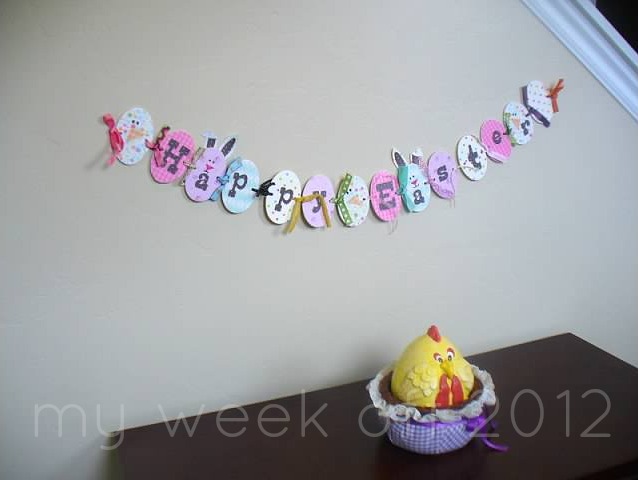
Our home seems to be lacking in decorations for all of the holidays besides Halloween and Christmas. I found a tutorial for making this cute banner for Easter.
I call this project a "breakthrough project" for me becuase I finally learned how to properly modge podge.
Exhibit A
Can you tell a difference?

Exhibit B
How about now?


See, no one ever actually told me you were supposed to sand down the edges. It makes for such a neater finish. Since then, I have been much happier modge-podge ing.
Anyway, for this project I just bought a dozen or so ovals (or eggs) and modge-podged each of them with a different spring-ish colored paper. Then I cut out the letters to spell "Happy Easter" with my Slice. Then I freehanded paper pieces to make little chick and bunny faces. I had to use a heavy duty hole punch to cute holes in each egg and then I tied each of them together with a different color of ribbon. I think it turned out pretty cute, if I do say so. We'll see how it fared in storage from the past year...


Our home seems to be lacking in decorations for all of the holidays besides Halloween and Christmas. I found a tutorial for making this cute banner for Easter.
I call this project a "breakthrough project" for me becuase I finally learned how to properly modge podge.
Exhibit A
Can you tell a difference?

Exhibit B
How about now?

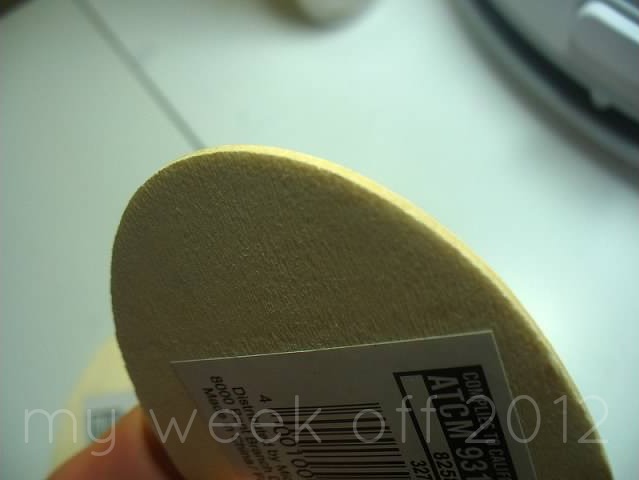
See, no one ever actually told me you were supposed to sand down the edges. It makes for such a neater finish. Since then, I have been much happier modge-podge ing.
Anyway, for this project I just bought a dozen or so ovals (or eggs) and modge-podged each of them with a different spring-ish colored paper. Then I cut out the letters to spell "Happy Easter" with my Slice. Then I freehanded paper pieces to make little chick and bunny faces. I had to use a heavy duty hole punch to cute holes in each egg and then I tied each of them together with a different color of ribbon. I think it turned out pretty cute, if I do say so. We'll see how it fared in storage from the past year...

Monday, February 25, 2013
Pesto Salad
I love finding recipes that my picky-ish daughter will eat. Even better when I like them. Even better when they are actually good for you! I found this one here.
Pesto Salad with Chicken, Feta and Tomatoes
Pesto Salad with Chicken, Feta and Tomatoes
- 1 pkg bow tie pasta
- 1 T olive oil
- 1 c basil pesto
- 1/4 c Italian dressing
- 1 c grilled chicken
- 2 c spinach
- 1 pint cherry tomatoes
- 1/2 feta cheese
- Cook the bowtie pasta according to package directions in a large pot of salted water. Drain the pasta. Drizzle with olive oil and stir around.
- Put the pasta in a large serving bowl and stir in the pesto and Italian dressing. Add the spinach, cherry tomatoes and feta cheese. Toss to combine. Salt and pepper to taste.
- Cover the pasta and refrigerate. If the pasta seems dry before serving, you can stir in another tablespoon of olive oil.
Monday, February 4, 2013
Rocky Road Brownies
Alright, maybe my quest for the perfect brownie isn't over quite yet.
These were good, but messy. USE NONSTICK FOIL. And lots and lots of nonstick cooking spray, otherwise you'll lose half of the brownie to the pan.

These were good, but messy. USE NONSTICK FOIL. And lots and lots of nonstick cooking spray, otherwise you'll lose half of the brownie to the pan.

- 2/3 c unsweetened cocoa powder
- 1/2 c all-purpose flour
- 1/2 t baking powder
- 1/8 t salt
- 1/3 c canola oil
- 1/3 c granulated sugar
- 1/3 c packed light-brown sugar
- 4 egg whites, lightly beaten
- 2 t vanilla extract
- 1/2 c finely chopped walnuts
- 1/4 c mini chocolate chips
- 1/2 c mini marshmallows
- Heat oven to 350. Line an 8 x 8-inch baking pan with nonstick foil, overhanging ends of pan.
- In medium-size bowl, combine cocoa powder, flour, baking powder and salt. Set aside.
- In a large bowl, whisk together oil, sugars, egg whites and vanilla. Stir in cocoa mixture. SPoon batter evenly into prepared pan. Sprinkle walnuts over batter. Bake at 350 for 25 minutes. Scatter teh chips and marshmallows over the top and bake for an additional 5 minutes. REmove from oven and cool completely.
- Tpo slice, coat a sharp chef's knife with cooking spray and cut into 25 squares, using a rocking motion. Re-spray knife frequently.
Monday, January 28, 2013
My First semi-Homemade Pie. Ever.
I was having one of those "being a mom is so hard" kind of days when my husband told me that he was taking the kids and for goodness sake would I go do something for myself.
So I decided to make a pie.
I've had the Crisco recipe for pie crust on my fridge for weeks now but I keep finding an excuse not to use it because, after all, the idea of making a pie absolutely terrifies me. I had, however, purchased some canned cherry pie filling so at least I didn't have to think past the pie crust.
I made 3 big mistakes:

It didn't taste terrible. Which is good. But as I was lamenting my first trial with my husband he said, "Yeah, pies are really hard to make." In spite of my 3 mistakes, my biggest frustration was actually tenting the outside rim with foil. I baked the pie for 10 minutes and went to foil the edges and burned my thumb instead. I guess you can foil the edges first and then take the foil off for the last 10 minutes as well; I didn't know about this option. Also, I found out that they make silicone rims to make the whole process much easier. Anyway, the edges of this pie ended up crispy.
Move over quest for the perfect brownie recipe because I think I just found a new lifelong ambition.
Next time I'm going to put my shortening in the freezer and a cup of water in the fridge. Just to be safe.
So I decided to make a pie.
I've had the Crisco recipe for pie crust on my fridge for weeks now but I keep finding an excuse not to use it because, after all, the idea of making a pie absolutely terrifies me. I had, however, purchased some canned cherry pie filling so at least I didn't have to think past the pie crust.
I made 3 big mistakes:
- I did not chill the shortening nearly long enough.
- My water was not icy cold. And I added too much of it.
- Apparently it takes 2 cans of filling to make a pie.

It didn't taste terrible. Which is good. But as I was lamenting my first trial with my husband he said, "Yeah, pies are really hard to make." In spite of my 3 mistakes, my biggest frustration was actually tenting the outside rim with foil. I baked the pie for 10 minutes and went to foil the edges and burned my thumb instead. I guess you can foil the edges first and then take the foil off for the last 10 minutes as well; I didn't know about this option. Also, I found out that they make silicone rims to make the whole process much easier. Anyway, the edges of this pie ended up crispy.
Move over quest for the perfect brownie recipe because I think I just found a new lifelong ambition.
Next time I'm going to put my shortening in the freezer and a cup of water in the fridge. Just to be safe.
Sunday, January 20, 2013
Fresh Broccoli Salad
My coworker had a bridal luncheon a few months ago. One of the ladies brought in a really delicious broccoli salad which another coworker requested that I find the recipe for. I googled "Broccoli Salad" and found this one from allrecipes.com. After I printed off a copy for this other coworker, I decided that it did, in fact, sound good enough to make myself so I gave it a try. YUMMY! Maybe one of the best broccoli salads I've had?

Fresh Broccoli Salad

Fresh Broccoli Salad
- 2 heads fresh broccoli
- 1 red onion
- 1/2 lb. bacon
- 3/4 c raisins
- 3/4 c nuts
- 1 c mayonnaise
- 1/2 c white sugar
- 2 T white wine vinegar
- Place bacon in a deep skillet and cook over medium high heat until evenly brown. Cool and crumble.
- Cut the broccoli into bite-size pieces and cut the onion into thin bite-size slices. Combine with the bacon, raisins, nuts and mix well.
- To prepare the dressing, mix the mayonnaise, sugar and vinegar together until smooth. Stir into the salad, let chill and serve.
Subscribe to:
Posts (Atom)