One of the best tips for card-making (my second true love when it comes to crafting--scrapbooking being the first) I have ever heard come from a scrapbooking television show I watch regularly. (With a cup of cocoa, might I add.)
Take an 8 1/2" by 11" sheet of cardstock, cut it in two evenly, and then score down the middle of each piece. This will yield two 4 1/4' by 5 1/2' pre-made cards which just happen to fit perfectly into the invitation-sized envelopes at your office supply store which just happen to cost $13 for a pack of 100. That's half the cost of what I have been paying to buy mine in bulk at a local scrapbooking store.
This year I made 7 different designs for my Christmas cards. (Only posting one here--love how this turned out!)
I just assembled them on a piece of 4 1/4" by 5 1/2" piece of cardstock and then when I was done, ran each assembly through my xyron and adhered it to my pre-made cards. Easy as can be! Thanks Scrapbook Memories!!
Thursday, December 23, 2010
Gift-wrapping
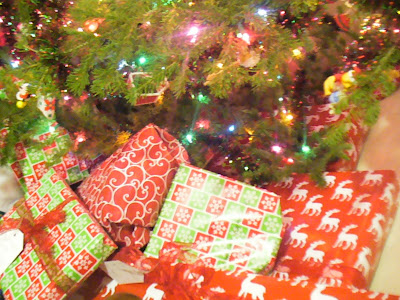
It seriously looks like our tree exploded into a mountain of presents at our house!
I love giving presents at Christmas. I start my planning early in the fall and eagerly anticipate the expressions of the recipients.
I am also a sucker for beautifully wrapped presents. I found a few years ago that buying one or two spools of wire-edged ribbon can turn ordinary into the extraordinary. I roughly measure the amount needed for a gift. Then I start at the top, cross underneath and then come back up, tying into a neat-ish bow. No tape required and super easy. (Sorry, no pictures because as it turns out, some things do require both hands to do!)
Getting sick so close to Christmas almost foiled all of my plans but thankfully I knew I wouldn't really be getting any time off between the first week of December and Christmas so most Christmas-ing was done early in December.
I also planned ahead and made some homemade gift tags. I cut one sheet of scrapbook paper into 12 3x4 squares and just lopped off a corner on each top. Then I punched a hole in the center.
Then I found some clear "To" and "From" stamps and some cute accents with holly and stamped the back of each tag assembly-line-style.
I then took some embroidery thread and tied each tag onto a loop of the ribbon.
So as you can see it doesn't take much to make a present look fantastic. Ribbon cost about $8 for 90 ft. (considering it took care of almost every package, I think that's pretty good), and I had the rest of the supplies on hand, including the wrapping paper which we bought earlier when Hobby Lobby had it on sale 50% off.
Monday, December 6, 2010
Pumpkin Puree
One of my favorite things I did this fall was puree my own pumpkin. My dad grew sugar pumpkins this year and, since they were a little too small to carve, they graced our entryway through November.
I didn't just want to throw them away but I've heard that baking pumpkin is sooo tedious so I was a little hesitant to try. But then I found a link on one of my favorite blogs on how to do it and it seemed pretty harmless so I thought I would give it a try.
Here they are beforehand. These three smallish-sized pumpkins yielded 12 cups so roughly 4 cups per pumpkin.
I washed mine pretty good and then quartered and de-seeded them. This was probably the most labor intensive part. But the instructions said to not be too picky about getting all of the strings out so I hushed the OCD voice in my head. And they turned out fine. I ended up baking mine for a little over an hour. If I were to change anything at all with this process, I would have probably let them go an extra 20 minutes or so. Here are the baked beauties!
I waited until they were completely cooled and then I peeled them while my daughter ate her dinner. I tried to get her to try some but she wasn't interested. (She's 16 months and is pretty set in her opinions. Watch her come running when this is turned into pumpkin pie, though!)
The next step is to puree this deliciousness down to a smooth consistency. I found that the pieces above were just a little too big to do a large batch in my Cuisinart so I (being a tad impatient) just broke them into smaller bits and it worked much better. Incidentally my daughter is deathly afraid of the blender but she intently watched every detail of this process. Go figure.
Once it was all nice and smooth I took sandwich-sized baggies, fit them into a 1-cup measuring cup and poured the puree as far as it would go. By the time you take the bag out it settles into a little more than 1 cup per bag. Great tip!
You want to expel as much air as possible (to prevent freezer burn, I suppose.) Here they all are ready to go into the freezer. The directions say they will last about 1 year. After they were frozen, and because these bags weren't technically freezer bags, I transferred 3 pumpkin bricks into 1 gallon size freezer-safe bag.
I will post when I have baking results!
Saturday, December 4, 2010
Christmas Ribbon Wreath
Hello, and welcome to my first post!
They say necessity is the mother of invention. In our case we needed a big beautiful wreath to grace the door of our new home. When I saw this one over at Better Homes & Garden I fell in love with the concept and decided to adapt it to a Christmas theme.
Here's the final product! I think it turned out swell.
If you are interested in making one yourself you will need:
Take one of the wire wreaths and wrap it with the bias-cut ribbon. This is why it is important to buy something that has a little bit of "give" to it. You will want to sew the two ends together.
Here's the completed form.
Cut the length of ribbon needed to make a large bow out of the 3 yards of wire-edge ribbon and set aside. Cut all the remaining ribbon and/or fabric into 9-inch lengths. If you cut on the diagonal it will give it more dimension. Here is my bag of cut ribbon. It took about 45 minutes to cut all of this.
Attach all of the cut ribbons and/or fabric randomly to the unwrapped wire wreath form using an overhand loop. I had no idea what an overhand loop was but I'm guessing it's something like this:
Here's about 1/3 of the way through:
And here is the finished product, total time about 2 episodes of Glee and 1 episode of the Amazing Race:
Craft projects are a great way to clear up space on your DVR!
When both sides are complete, you sew the two together. You could sew both forms together going on the outside and the inside, but I found sewing the outside only was enough to make it secure.
Take that wire ribbon you saved and make your bow. I'd never done this before either but I guessed that you just gather your ribbon in the middle,
and take a piece of wire around the middle to hold it together and fluff it out a little bit.
Finally, you take your cookie cutter (mine is a star) and attach it and the bow with another piece of wire.
And there you have it! Here's another picture in case you forgot what it looks like completed.
I would say it is one of the easier projects I've completed. The final result is satisfying as well. Be prepared that, if you buy ribbon that is glittered, you will end up with glitter everywhere. I don't mind it but, then again, I'm not the one who usually vacuums!
They say necessity is the mother of invention. In our case we needed a big beautiful wreath to grace the door of our new home. When I saw this one over at Better Homes & Garden I fell in love with the concept and decided to adapt it to a Christmas theme.
Here's the final product! I think it turned out swell.
If you are interested in making one yourself you will need:
- two 18-inch-diameter wire floral wreath frames (about $2 each at Jo-ann's)
- 1-1/2-inch-wide bias-cut silk ribbon
- Sewing needle (I used one that was more for tapestry.)
- Heavyweight thread
- 3 yards of sheer wire-edged ribbon (the stuff is EVERYWHERE right now for Christmas.)
- Crafts wire
- Ruler
- 100 yards of 3/4-inch to 1 1/2-inch ribbon or bias-cut fabric strips (YES YOU READ THIS RIGHT! It really does take 100 yards! But like I said, it's everywhere...total cost for 100 yards of ribbon by the way was about $20--everything was on sale 50% off at Jo-ann's and Hobby Lobby.)
- Themed cookie cutter (99 cents at Hobby Lobby.)
Take one of the wire wreaths and wrap it with the bias-cut ribbon. This is why it is important to buy something that has a little bit of "give" to it. You will want to sew the two ends together.
Here's the completed form.
Cut the length of ribbon needed to make a large bow out of the 3 yards of wire-edge ribbon and set aside. Cut all the remaining ribbon and/or fabric into 9-inch lengths. If you cut on the diagonal it will give it more dimension. Here is my bag of cut ribbon. It took about 45 minutes to cut all of this.
Attach all of the cut ribbons and/or fabric randomly to the unwrapped wire wreath form using an overhand loop. I had no idea what an overhand loop was but I'm guessing it's something like this:
Here's about 1/3 of the way through:
And here is the finished product, total time about 2 episodes of Glee and 1 episode of the Amazing Race:
Craft projects are a great way to clear up space on your DVR!
When both sides are complete, you sew the two together. You could sew both forms together going on the outside and the inside, but I found sewing the outside only was enough to make it secure.
Take that wire ribbon you saved and make your bow. I'd never done this before either but I guessed that you just gather your ribbon in the middle,
and take a piece of wire around the middle to hold it together and fluff it out a little bit.
Finally, you take your cookie cutter (mine is a star) and attach it and the bow with another piece of wire.
And there you have it! Here's another picture in case you forgot what it looks like completed.
I would say it is one of the easier projects I've completed. The final result is satisfying as well. Be prepared that, if you buy ribbon that is glittered, you will end up with glitter everywhere. I don't mind it but, then again, I'm not the one who usually vacuums!
Subscribe to:
Posts (Atom)